Why might screenshots or videos be needed?
A visual representation of the question helps the specialist understand the necessary context for the solution in more detail.
Often, screenshots or videos are needed for analysis, and without these materials, it is technically impossible to understand the problem and fix it.
What we might request from you:
the link to the page with the problem;
your login for the learning platform;
a screenshot of the error;
a screen recording demonstrating the issue
None of this will require any specialized knowledge beyond that of a regular PC user, but it will greatly help us resolve your issue faster.
Below we will explain how to take a screenshot on different operating systems and how to record a screen video.
What should the perfect screen fragment contain?
It is important for support staff to consider every detail in order to correctly identify the problem and find a solution.
Therefore, it is very important to see the entire screen, without cropping or editing.
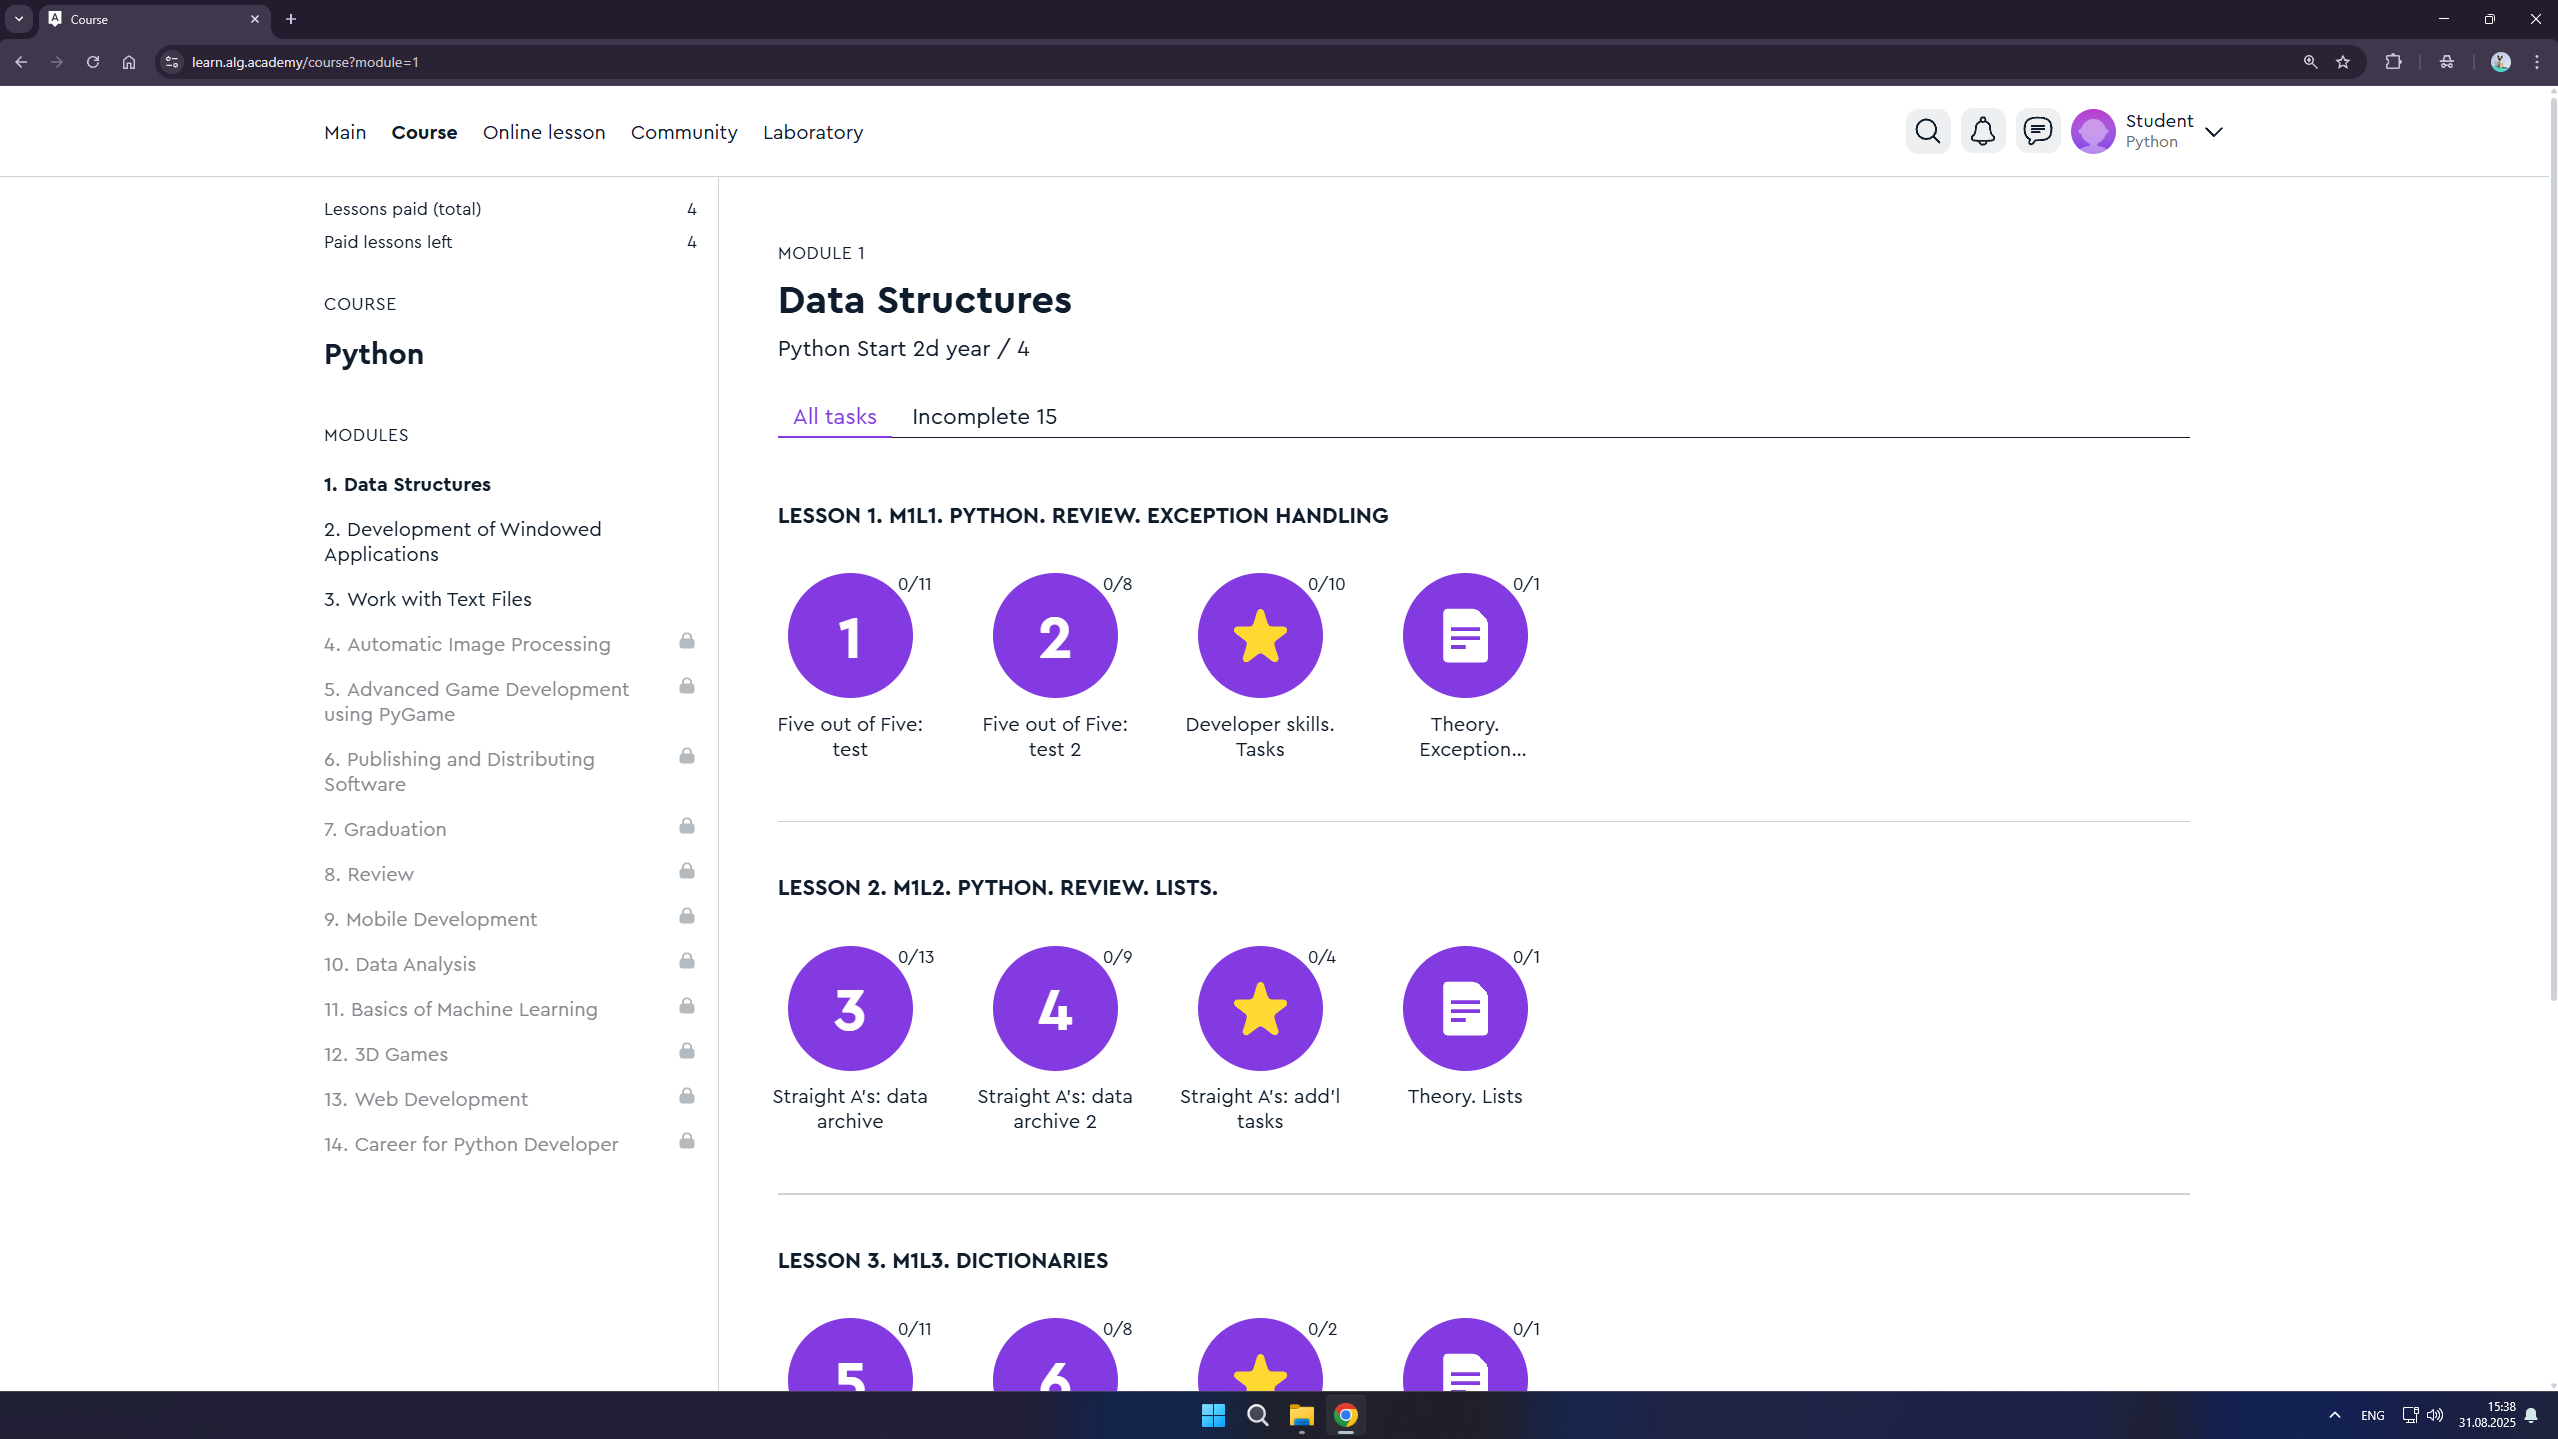
How to do it correctly:
How to do it incorrectly:
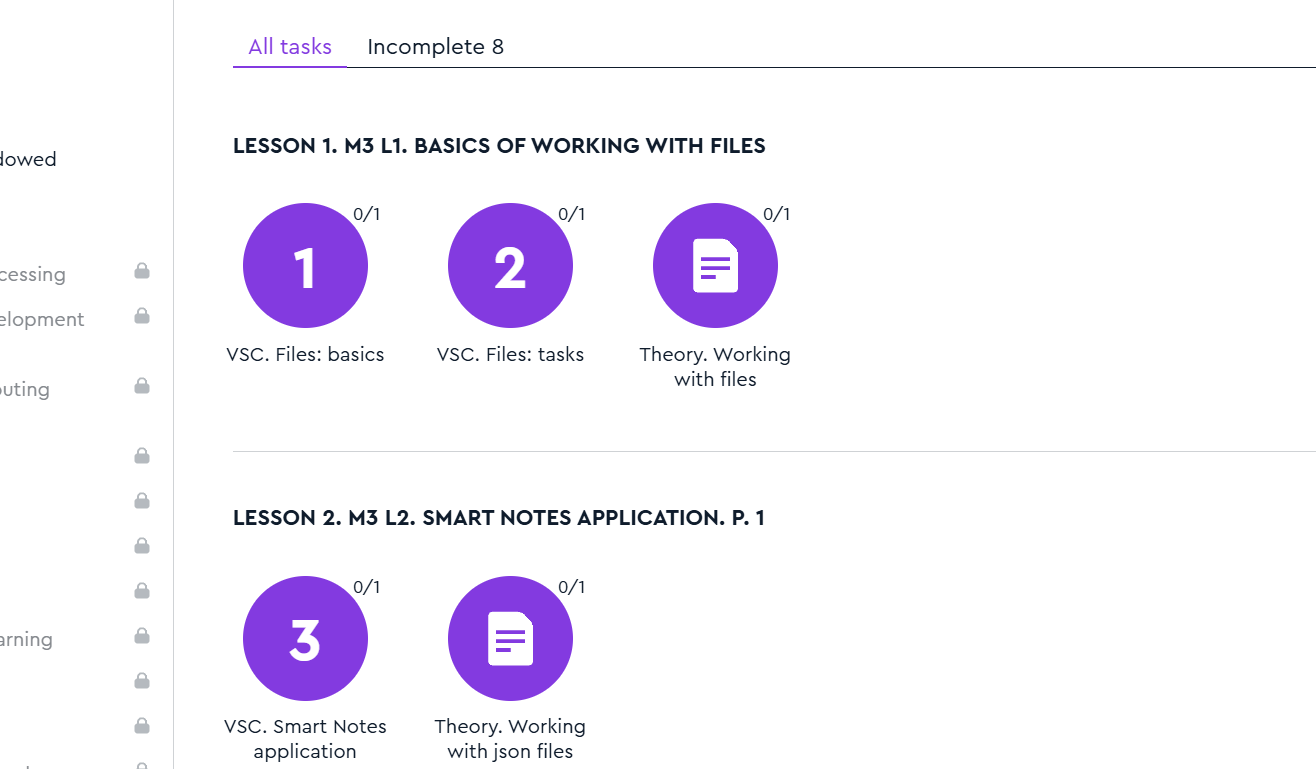
As you may notice, in the incorrect version, the work area is cropped, and elements such as the course name, link, username, and programs running in your system tray are not visible. All these and many other details can directly or indirectly affect the diagnosis and subsequent resolution of the issue.
How to take a screenshot?
We suggest installing the unified Lightshot program, which is compatible with any common operating system.
Proceed to install the program by downloading and running the installer from the link: https://app.prntscr.com/en/
After installing the program, it will be available for launch by pressing the key:
For Windows: Press the Print Screen key and select the desired area of the screen.
For macOS: Press the key combination Shift+Cmd+9 and select the desired area of the screen.
Save the created screen fragment as a file and send it in the chat with the support agent.
The program is convenient because it has all the necessary tools for fully creating a screenshot, and it also does not require Administrator permission to use.
Linux
By default, a full-screen screenshot is taken using the Print Screen key on the keyboard. The screenshot will be saved in the "Pictures" folder within your home directory.
For Linux, there are also various utilities for taking screenshots. However, since on this OS much depends on the specific distribution, we do not describe them, as this is not a universal method.
How to record a screen video?
The chat with technical support has a file size limit of 10MB for uploads. After recording, please upload the video to Google Drive or YouTube with link sharing enabled, and then share the link with the support agent.
For all platforms
Install the Loom extension for Google Chrome browser and record screen videos without installing additional programs on your PC.
Windows
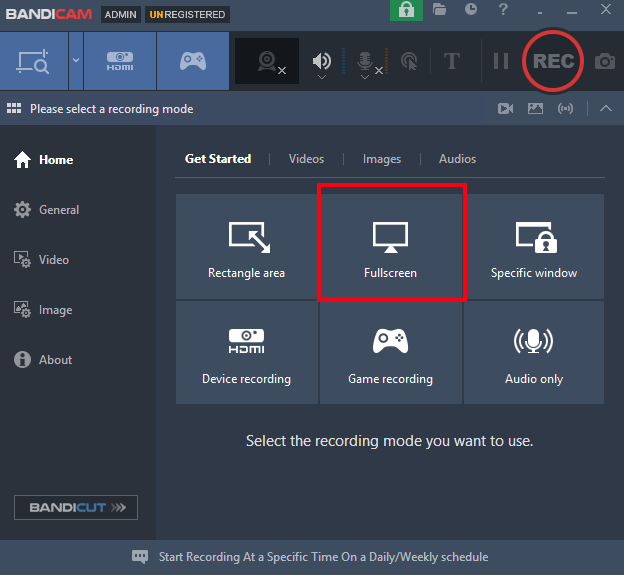
After installing the program, select the "Full Screen" mode in its interface (Screenshot 1).
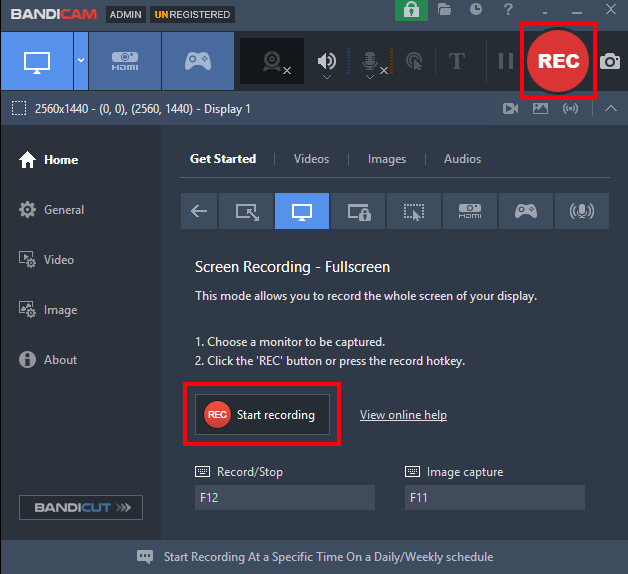
Then you need to start recording by clicking the "REC" button. You can stop it by clicking the same button (Screenshot 2).
All recordings can be found in the "Video" tab. By default, files are saved to: C:\Users\your_username\Documents\Bandicam.
macOS
Program QuickTime Player
Linux
Program RecordMyDesktop
Installation:
sudo apt-get install gtk-recordmydesktop