Remote connection
In situations where our recommendations did not help resolve the issue, we will be happy to assist you and remotely connect to your computer to personally fix the problem or collect the necessary data for the development team.
Program for remote connection
For remote connection, we use only one program - AnyDesk.

This program installs in one click and the specialist can start the remote connection immediately.
Please note that a stable internet connection is required for remote connection.
Speed: from 30 Mbps.
Program installation and remote connection
Download the AnyDesk program file to your device.
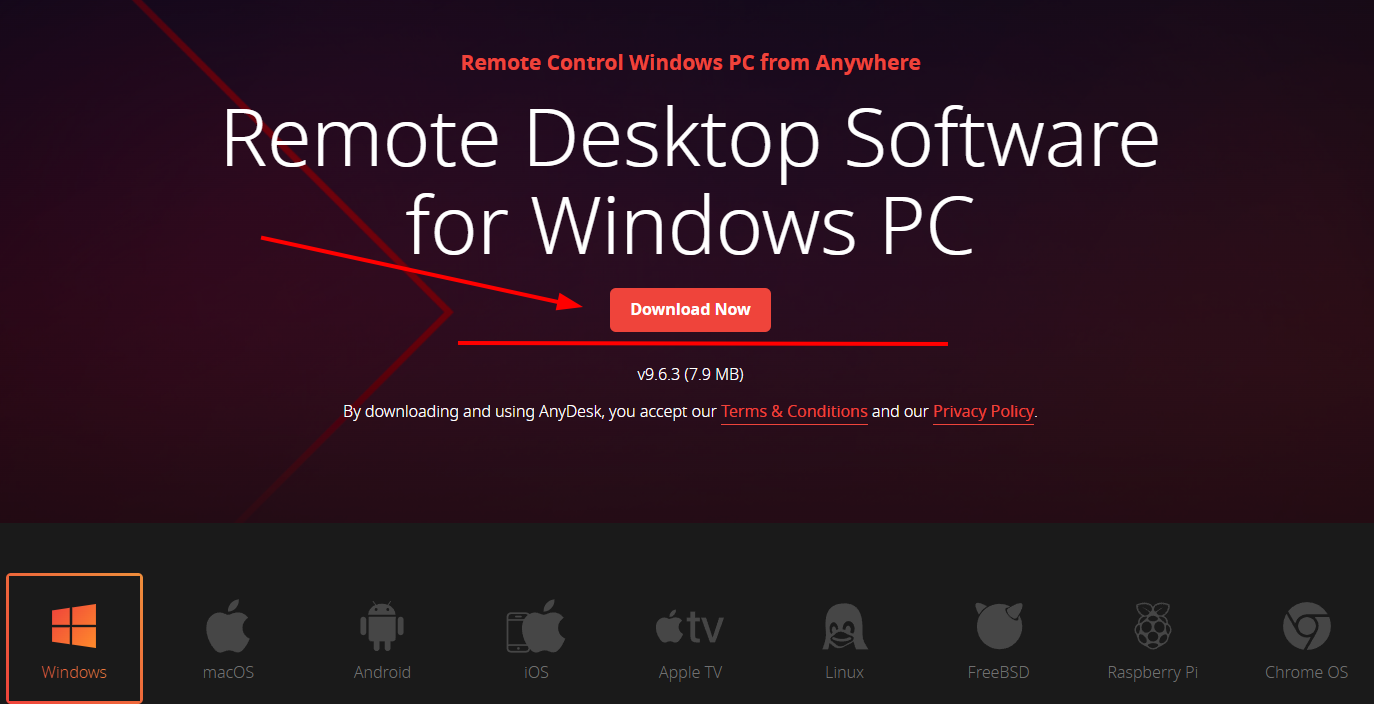
The website will automatically detect your operating system.
You need to click the "Download Now" button in the center of the screen, marked with an arrow, after which the program installation will begin.
Once the AnyDesk download is complete, open it by clicking on the pop-up window.
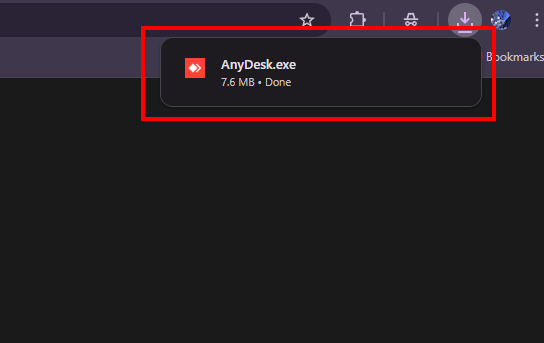
For remote connection to be possible, the program must be running.
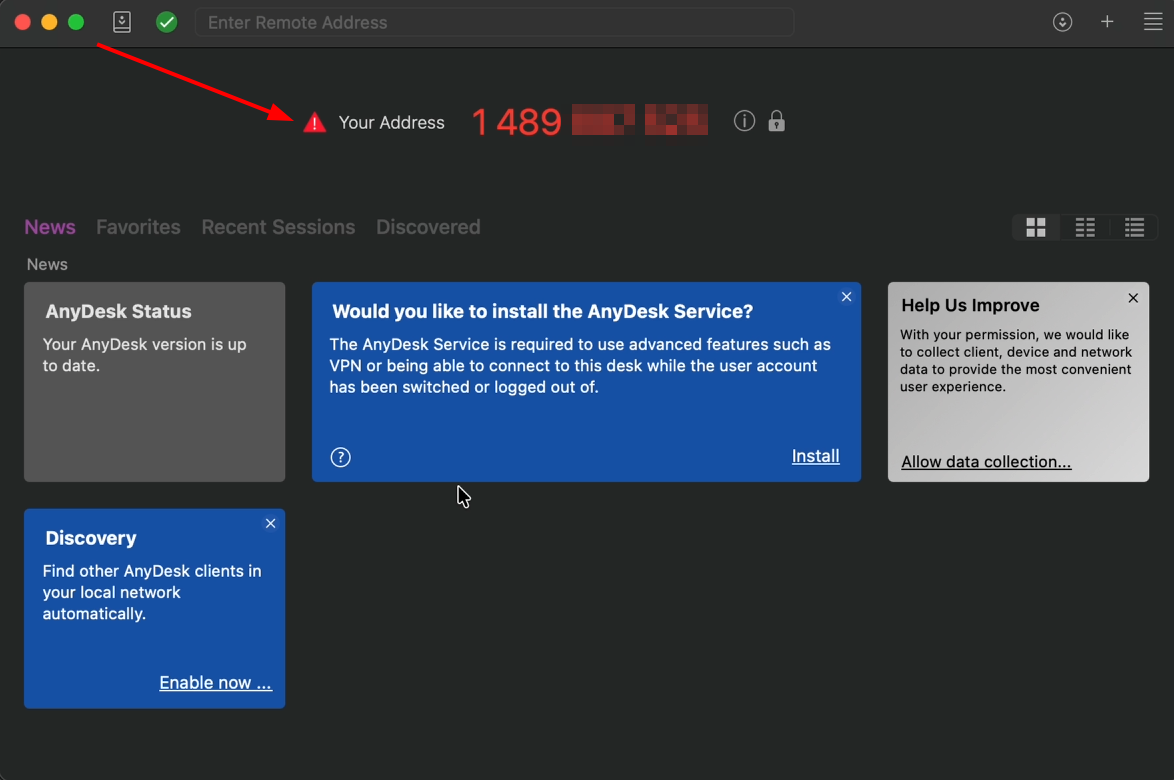
Your Address is located in the center top of the program:
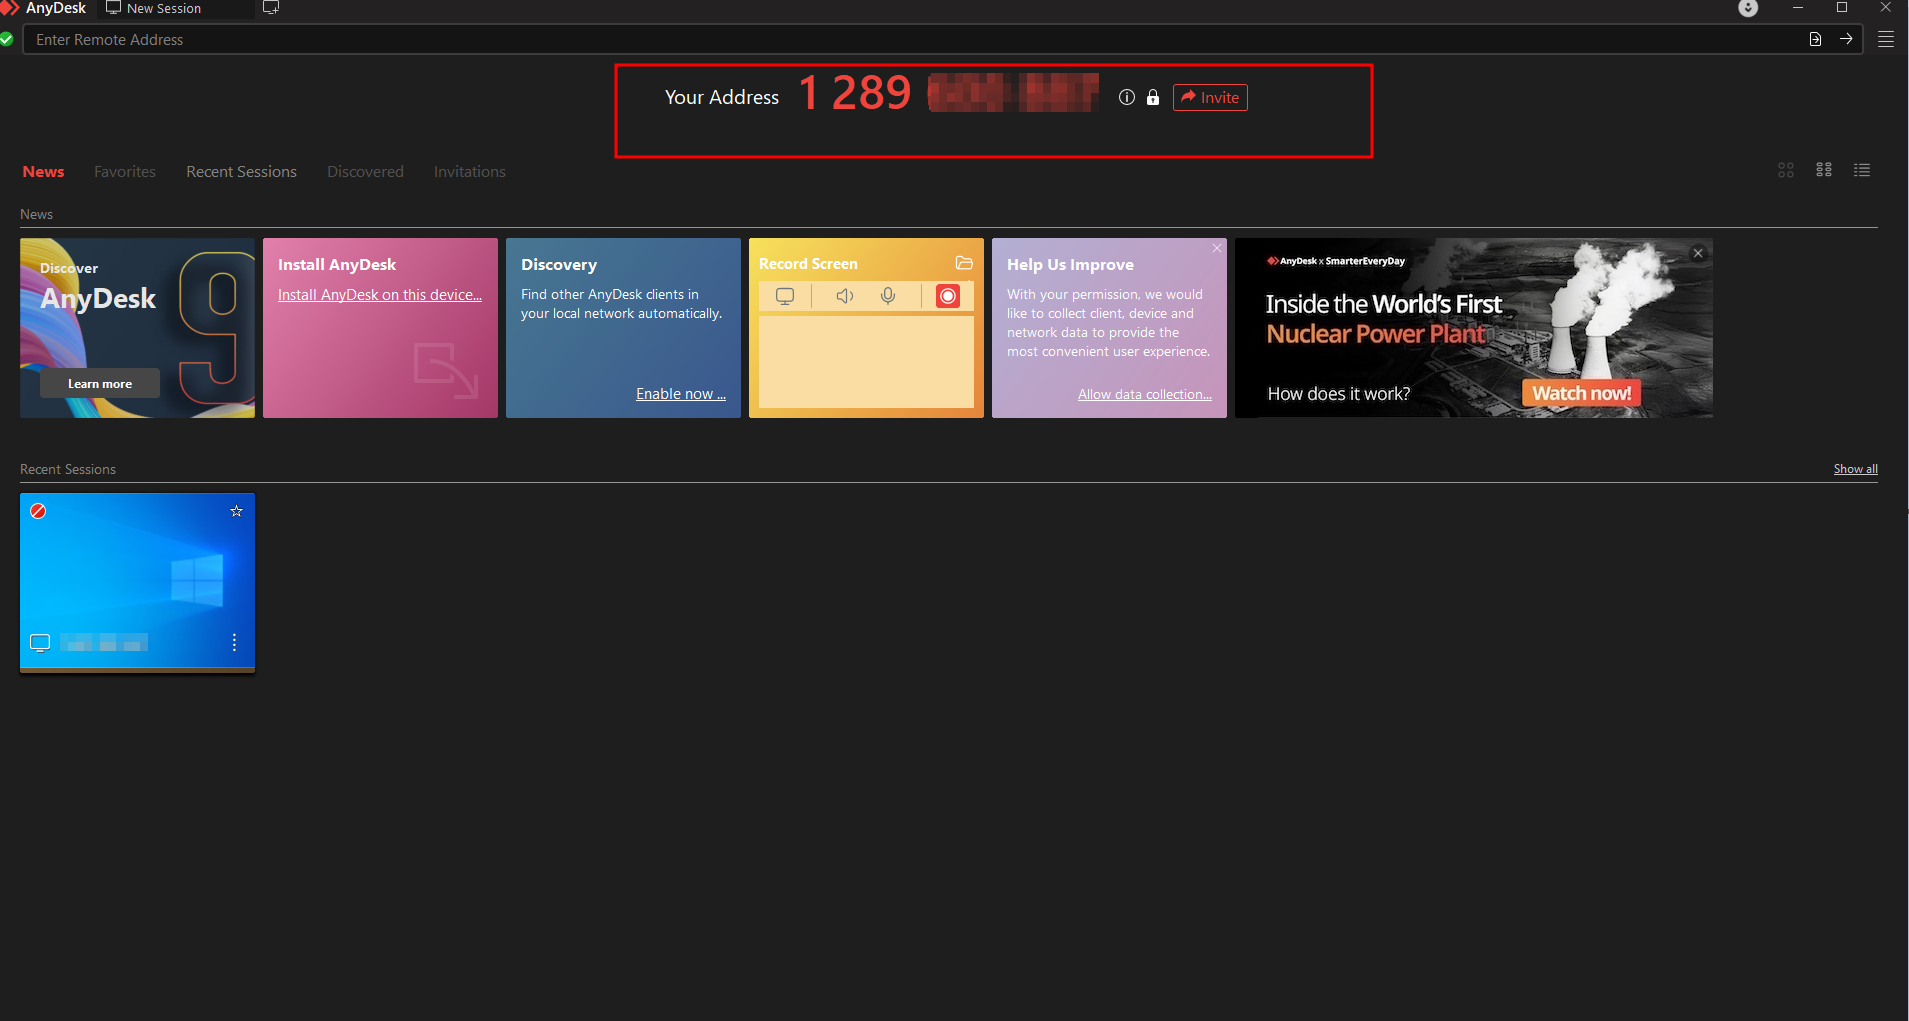
To use AnyDesk, you need to provide your Address to the support specialist. After the request is received, configure the access profile for the agent by granting full access, as shown in the screenshot. This is necessary so that technical support can fully use the device. After configuring the profile, click the green accept button.
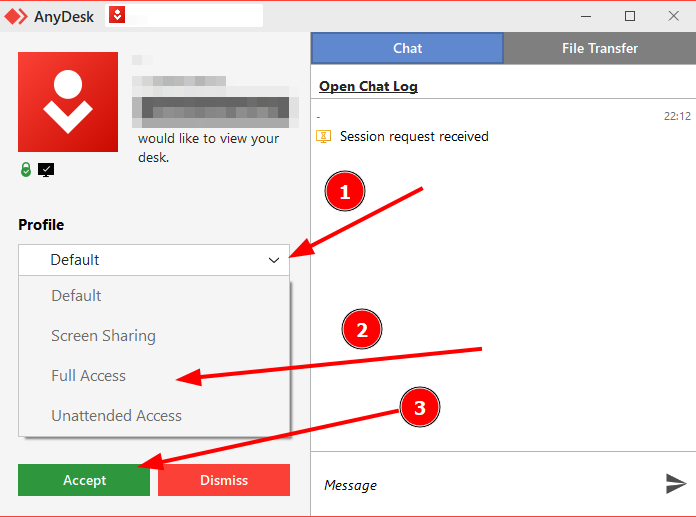
After accepting the request, you need to set aside the mouse so the specialist can control it, as the input devices become shared.
Done! The specialist will perform a check and try to help resolve your request.
MacOS
For AnyDesk to work correctly on macOS, the application must be granted all necessary permissions.
When you launch the program, a window opens showing the items that need to be updated.
Enabling all accesses is mandatory; otherwise, the program cannot function properly.
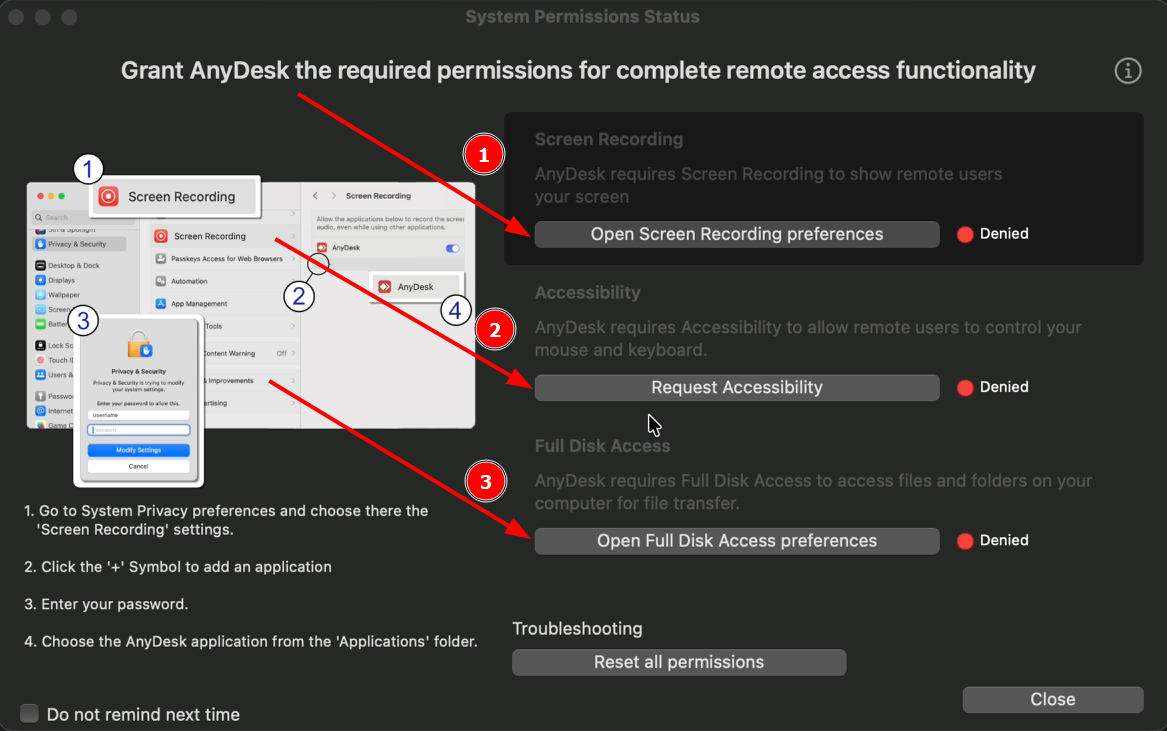
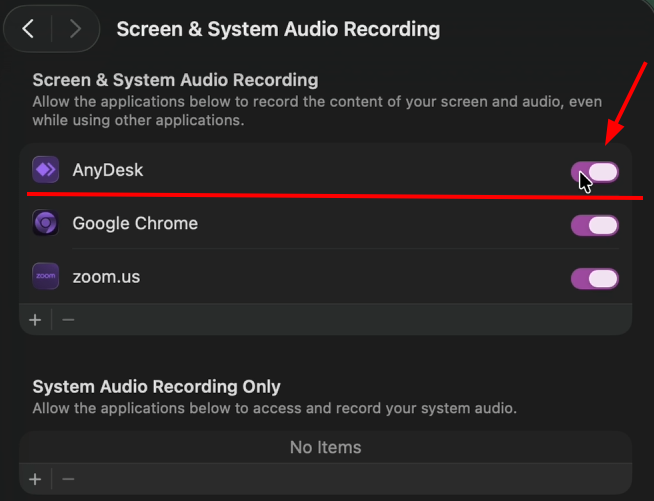
Screen Recording
When you open it, it will prompt you to go to the settings.

Switch the setting to the "On" state.
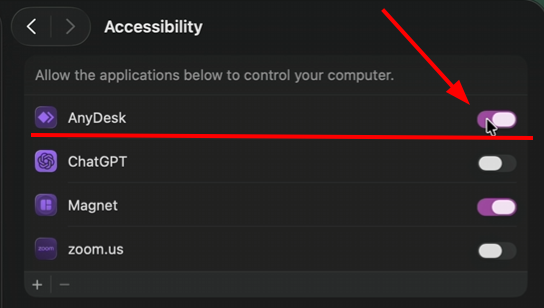
Accessibility
Switch the setting to the "On" state.
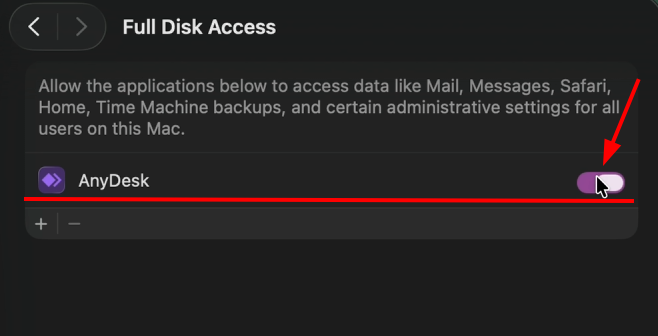
Full Disk Access
Switch the setting to the "On" state.
After completing all the steps, check that the ⚠️ icon is no longer displayed. If it is present, click on it and grant the additional permissions that the program requests.
If something still went wrong, please write to technical support about it, we will be happy to help you